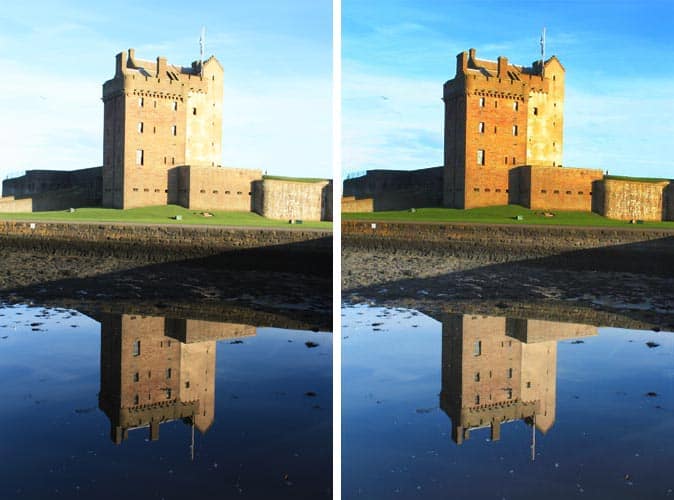
 CORRECTING AN OVEREXPOSED SHOT CAN BE TRICKY BUSINESS.
In this example, an image of Broughty Ferry Castle in Northern Ireland, the late afternoon sun casts a harsh glare against the facing castle walls, while the sides of the castle and the river in the foreground are in deep shadow. The brightest parts of the image are nearly blown out, while the shadow areas are so dark that it’s hard to see any detail.
Luckily, there are a few great methods in Photoshop that can help bring this image back into balance. This particular method is one of my favorites, because it’s fast and practically foolproof.
![]()
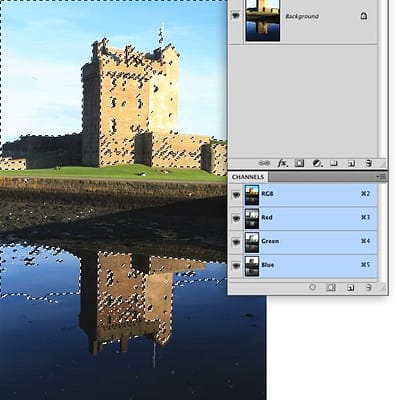
 Open your Layers and Channels palettes. In the Channels palette, Hold down the Command key (or Ctrl on a PC) and click on the RGB channel icon.
This will select the brightest parts of the image, according to their Luminosity.
Press Command-J (or Ctrl-J on a PC). This creates a new layer containing the selected area only.
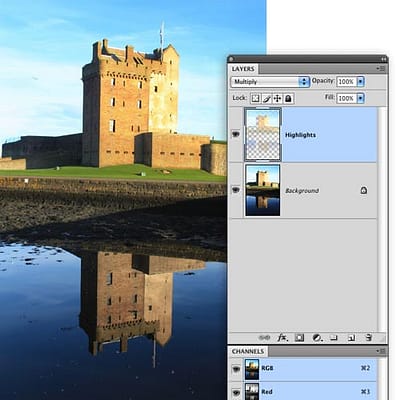
Name this layer “Highlights” and set the blend mode to Multiply.
This has the effect of darkening and intensifying the color and contrast in the bright areas of the composite,![]()
 If your image is overexposed in one area and underexposed in another, like this example, add a layer mask by selecting Layer→Layer Mask→Reveal All.
Use a large, soft brush, or create a black & white gradient on the layer mask to hide or reveal portions of the layer. For best results, avoid hard edges when painting the mask, or apply a gaussian blur to the mask. Is the effect too strong? Simply lower the opacity of your highlight layer. Want it even stronger? Duplicate the layer, as I’ve done here.
These same steps can also lighten shadow areas by choosing Select→Inverse after making your selection in Step 1.
Then set the blend mode of the layer you create in Step 2 to “Screen” instead of “Multiply.”
In this example, two “Highlights” layers and one “Shadows” layer are combined to create richer color and better contrast.

